

Once I had the design for Dawn, I drew it to scale on paper to help me visualize how the end result would look. I spend a lot of time visualizing a project before I start building it. I visualize both how it will look and how exactly I am going to build it. Its a huge time saver to run the project through in my head first. I do it over and over again, imagining every step in detail to work out any planning flaws ahead of time. Once I feel confident in the plan, I start work.

I began by laminating pieces of solid hardwood maple ply to build a block to carve the flames out of. I glued three pieces to start with and clamped them tightly until the glue dried. I continued adding a couple of pieces at a time until I had a block of wood big enough.
I carved the center of the Sun out of a chunk of alabaster. Alabaster is a relatively soft stone so it was easy to work with. I used a tile cutter for basic shaping and then finished with the same grinders and sanders I use for wood.
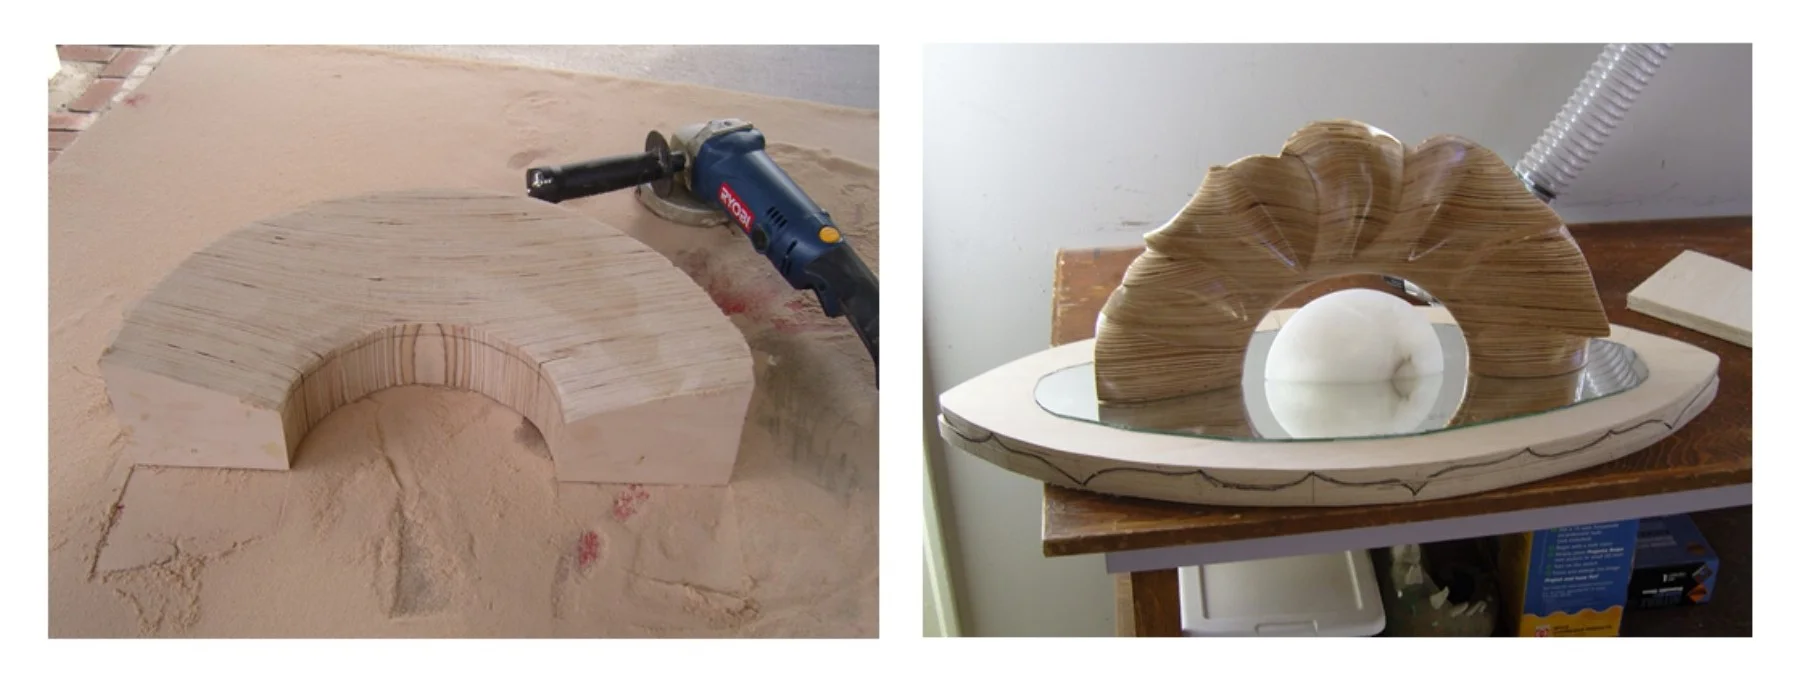
Using an angle grinder I formed the basic shape for the outer portion of the sun. Then I cut the flames following a line I drew along the crest. To finish the wood, I started sanding with 80 grit sand paper and continued with finer and finer grits all the way to 400 grit. Then I rubbed gloss polyurethane into the wood with a rag. I repeated this 8 – 10 times in very thin layers. This method of application creates a wonderful deep satin finish.

To make the mirror, I cut two pieces of 3/4″ solid hardwood maple ply to the basic shape of the center piece. I routed the shape of the mirror into one side at slightly deeper than the thickness of the mirror. This allows some room for glue. Then I temporarily connected the two pieces using screws placed in areas that will be removed later. I then shaped and finished the edges.

Next I cut out the center for the mirror and sanded it all for the final finish. I cut the lower portion of the circle out of 3/4″ walnut.

After shaping and finishing the walnut, I used orange tint to color both center portion pieces and applied polyurethane to all three. Then I attached the underside of the center portion to the walnut with large screws.

I attached a temporary base so the piece would stand safely while I worked on it. Then I attached the mirror and the second orange layer. These pieces were glued simultaneously to nest the mirror properly with the top. Once everything had dried, I sanded the joint until the seam was perfect and touched up any color that was lost from sanding. Then I finished anything that needed it with more polyurethane.

Next I attached the base and mapped out the positioning of the top pieces using tape. I attached both the alabaster and the wood using epoxy glue.
