

To start this project, I wanted to plot the basic dimensions of a shell. First I stood the model on end and photographed it from all four sides. Then I drew evenly spaced lines over all four pictures to represent the layers of wood and added a center line at the same spot on each. I took the measurements from the center line to the outside of the shell – for every layer and in both directions. The above picture gave me measurements for lines 1 and 5, the next picture for lines 2 and 6 etc. With the information from all four pictures I was able to get the basic shape of each layer by plotting them on a page like the one above. I did this for every layer and by aligning all the pieces correctly in a stack I got the fundamental shape of the shell.

Once I had all the pieces cut, it was time to start gluing. I glued two joints at a time, giving them time to set before adding more. I had to be mindful of always having a way to clamp the wood. In some cases I adjusted the shape of a layer to make that easier.
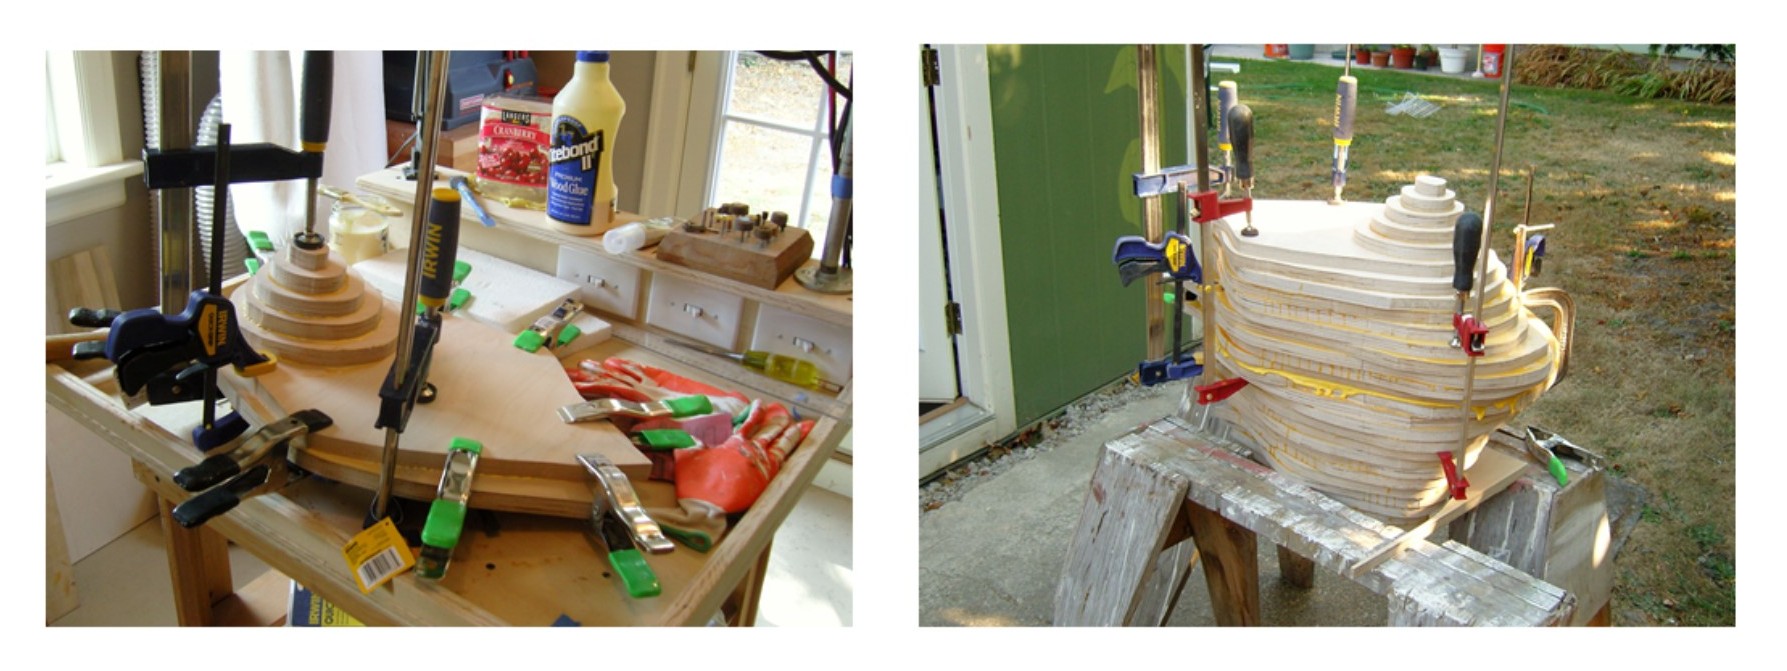
Some time and lots of glue later I had one very big chunk of wood to work with. Once the glue was dry, I began to shape the shell.
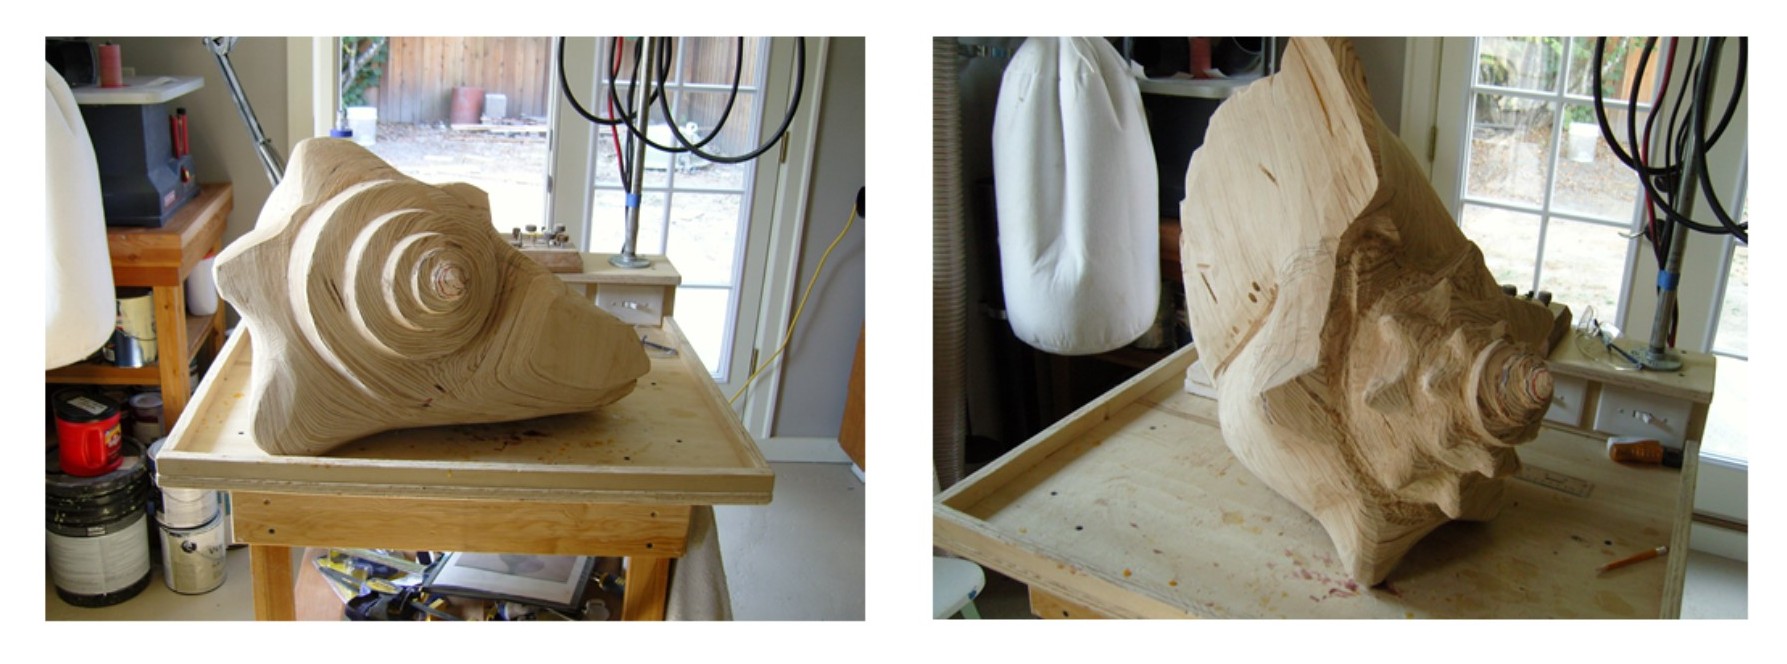
First I payed attention to the macro shapes. The shapes and the lines have to be right at all stages. Using an angle grinder and Dremel, even a chainsaw at one point, I created the basic structure of the shell. Once the spiral was cut, I started to add detail.

I imagine this kind of work as slowly increasing the definition of the piece. I keep working the shape until I’m satisfied that it is right, then I switch to details, and then I switch to sanding and perfecting the finish.

I started with 80 grit sandpaper, sanding until it looked smooth. Then I switched to 120 grit and sanded until that looked smooth. I worked all the way down to 400 grit paper before applying the finish .

To finish the shell I rubbed gloss polyurethane into the wood with a rag. Once the first coat had dried, I applied another thin coat to the shell. I did this a total of 8 – 10 times, sanding lightly between coats with 000 steel wool, until the piece had a deep lustrous shine.
